National Banana Bread day was on February 23rd. I'm a little late to the party but whatevs. Summer is the season in which I'm accustomed to eating it. In fact, you might say that I'm programmed to eat banana bread during this time of year.
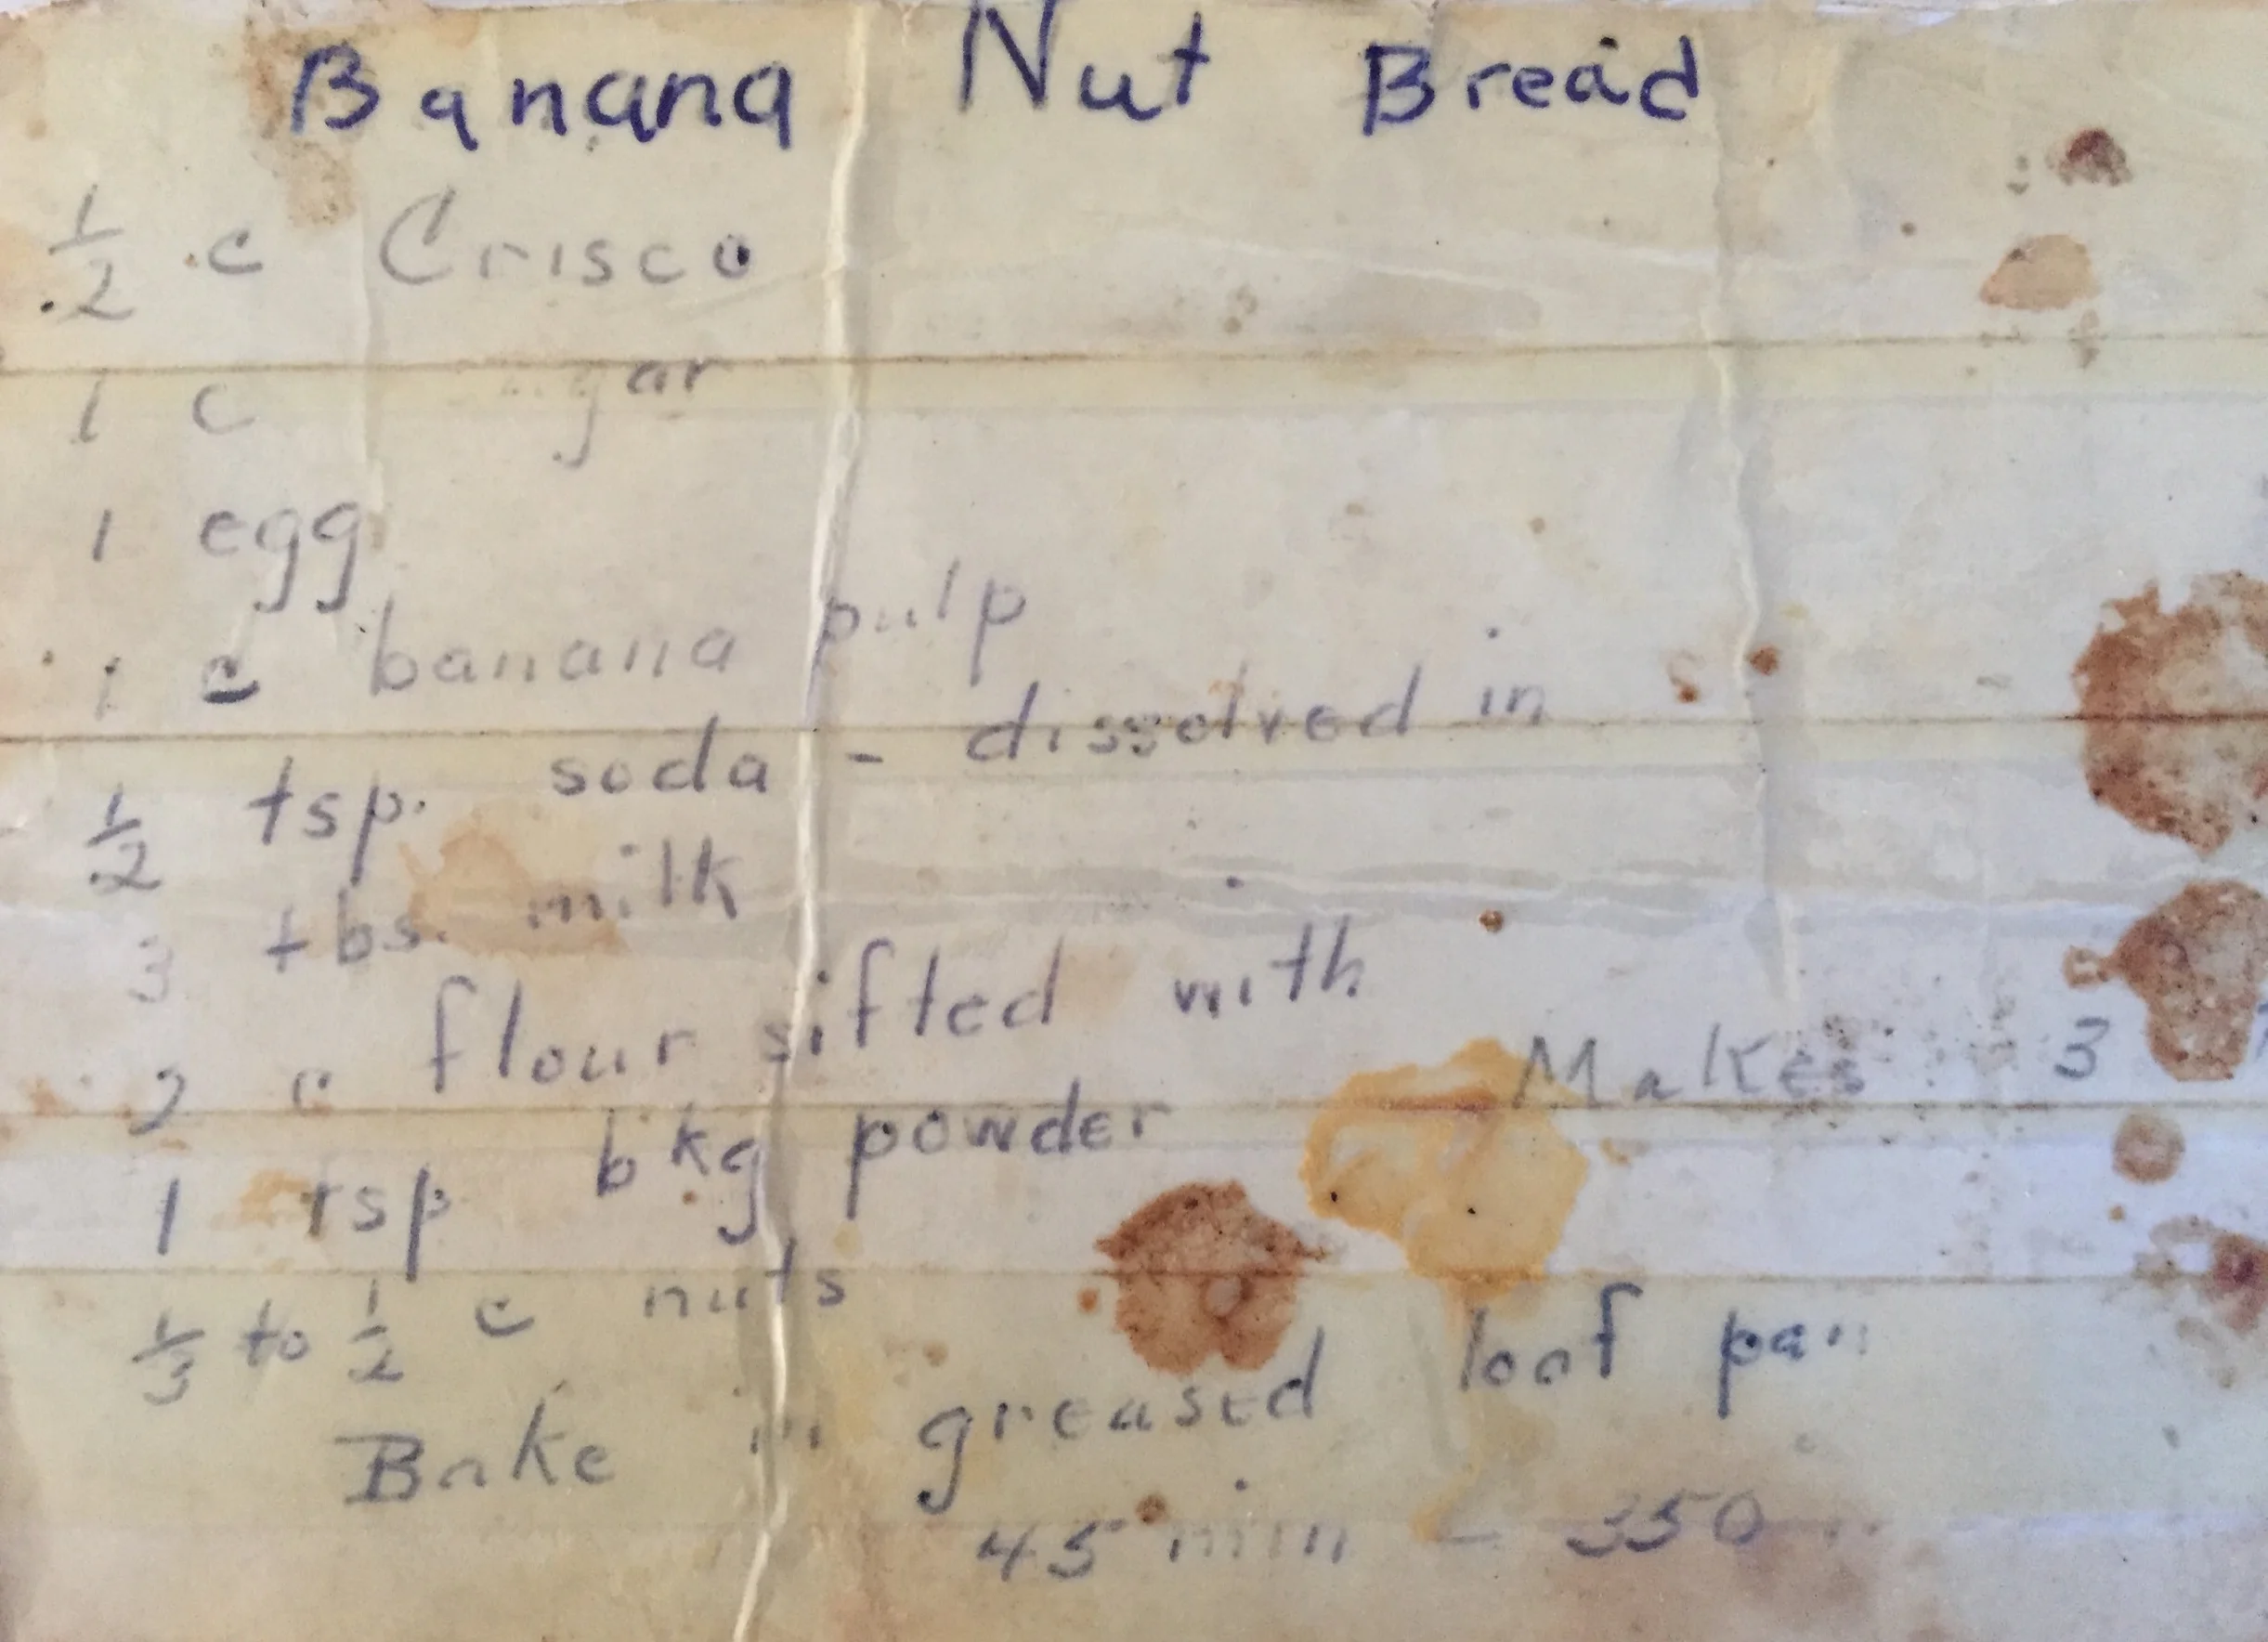
I grew up in Colorado where thunderstorms ruled the sky in summertime afternoons. It was an ominous yet exciting spectacle. A horizon of towering dark clouds would blanket the peaks of the Rocky Mountains and with the clouds was a monsoon-like downpour and a powerful lightening show. This meant that I retreated inside with my siblings to watch the storm from behind glass windowpanes. Every afternoon, indoor activities - board games and reading and art projects - were an integral part of our summer routine, as was eating banana bread. My mom probably made it once a week in the summer when we were kids. And I'm pleased to share this recipe which is from my late grandmother Everett's pantry. I included a photocopy of her original recipe card -- with its faded blue ink and crinkled paper and food stains, you can see that it has gotten quite a bit of use over the years!
There is something curious about banana bread. I wonder who's idea it was to look at a handful of squishy black bananas and think, "Hm, I'm going to be the first person to mash these into a pulp and bake 'em into a cake-like bread loaf." A novel idea indeed. Some believe that banana bread was a product of the Great Depression; homemakers wanted to salvage food any way they could, even if their food was on the brink of decomposition. Which brings me to the central word of advice in this post: your bananas are ready for baking when their color has changed completely. And I'm not talking about brown speckles. You'll be tempted to use them once they soften and get speckley, but don't. Wait until the bananas have blackened and lost their yellow hue. It is at this stage that you will capitalize on the bananas' strongest flavor which in turn produces the most flavorful bread.

recipe
- 4 oz unsalted butter, room temperature
- 1 cup sugar
- 1 egg
- 1 cup banana pulp (see note above)
- 1/2 tsp baking soda
- 3 tbsp milk
- 1 tsp baking powder
- 2 cups all-purpose flour
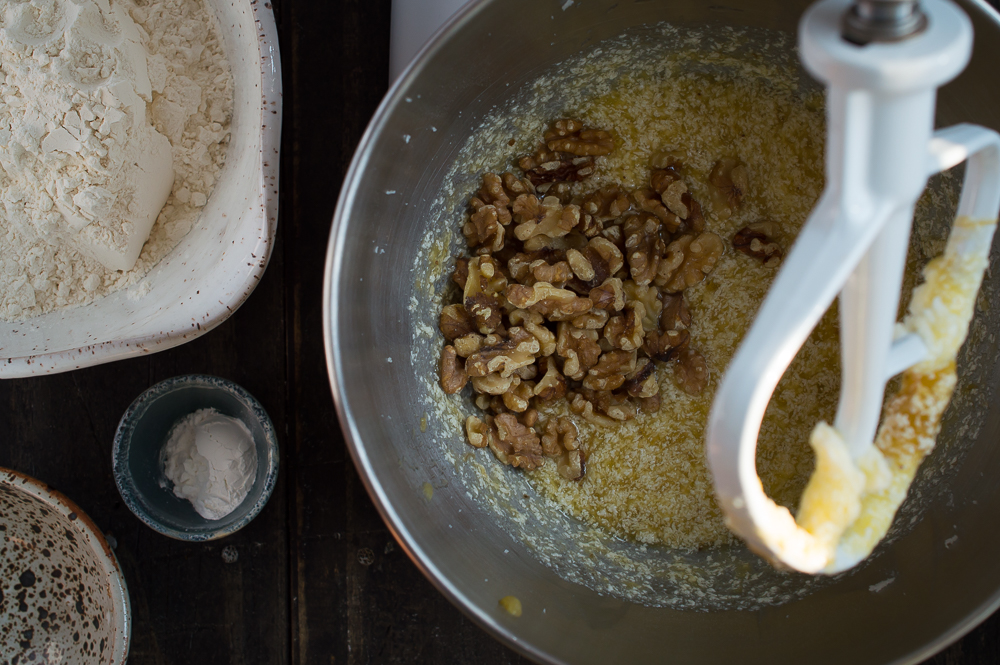
- 1/2 cup roughly chopped walnuts, lightly toasted
- Place the oven rack in the middle part of the oven and preheat to 350°. Butter and flour one large loaf pan (or two pans if yours are on the smaller side). Have all ingredients measured out and ready to go.
- Cream the butter. In the bowl of a stand mixer fitted with a paddle attachment, beat the butter and sugar on medium-low speed, scraping down the sides of the bowl as needed.
- Add the egg and continue beating on medium-low speed until the mixture becomes well-combined and fluffy.
- Mash the banana pulp thoroughly in a small bowl or liquid measuring cup. Mash it really well. Add the banana pulp to the mixing bowl and continue beating until it has fully incorporated into the creamed butter mixture.
- Measure out the 3 tbsp whole milk in a small bowl and then add the baking soda to the milk and stir to dissolve. A bit of residue is okay. Add the milk to the mixing bowl.
- Sift the flour and baking powder into the mixing bowl and mix on medium-low speed to combine. Turn off the machine to scrape down the sides of the bowl. Turn on the machine and add the walnuts to mix again. Your batter is ready!
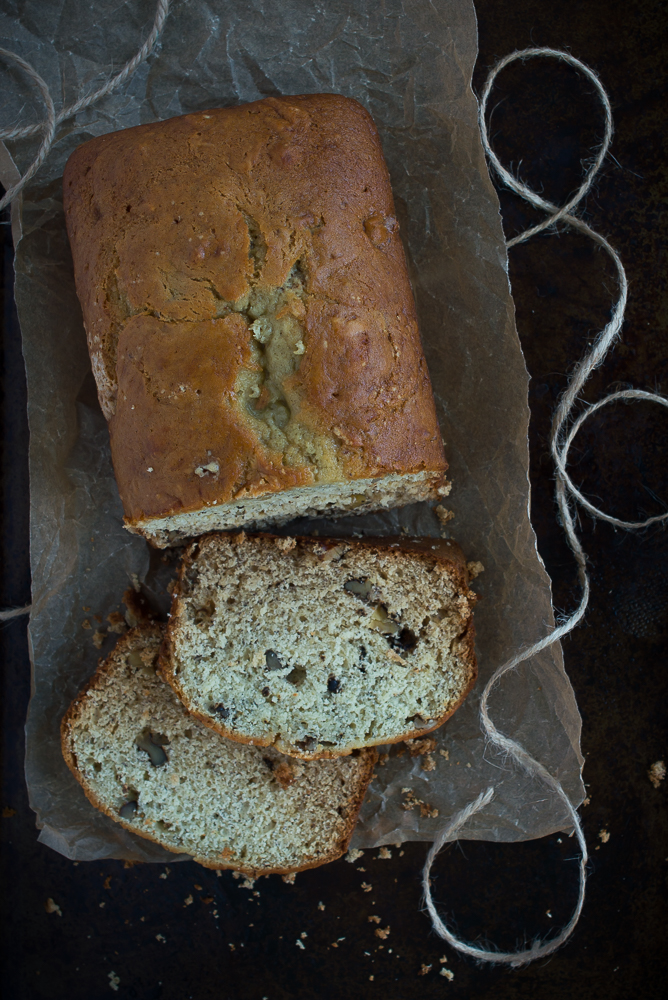
- Pour the batter into your prepared loaf pan and bake for 45 minutes at 350° (make sure you are using an oven thermometer!) The bread is done when the top and sides have browned and the bread has passed the toothpick test - if the toothpick comes out wet, bake for another 5-10 minutes. If the toothpick comes out dry then the bread is done.
If you make this recipe, hashtag a pic to #spiceandhutch and post to Instagram, Facebook and/or Twitter. I'd love to see your culinary creations!